

If you are new to Linux, there are some initial configurations you should make to your new system to keep it up to date and secure. This is especially important if you plan to expose your system to the Internet.
I’ll be making these configurations using a terminal emulation software called PuTTY. If you are using a GUI, you can follow along by using the Terminal application.
First, if you aren’t already, let’s get signed in. On a terminal, you first need to enter your username then press enter. You will be asked to enter your password next. One thing that trips up new Linux users is that as you type your password, nothing happens. This is normal. Enter your password then press Enter.
If you did this right, you should be greeted with something that looks like username@debian:~$. Don’t worry if the text doesn’t match exactly. We’re now ready to start making our configurations.
As a general rule, you should never log into a Linux system using root. Root is the top-level administrator and as such, has the ability to do anything on the system without restriction. There is no higher user on the system than root. For this reason, it’s best practice to grant specific users the ability to use the sudo command to perform administrative-level tasks on the system.
Let’s grant ourselves rights to use the sudo command. To do this, we first need to become root since for now, no one else on the system has administrative rights. To switch to the root user, enter the following command, su followed by the enter key. If you did this right, you should be asked for a password. Enter the root password you set up during installation.
When you become the root user, you should see something that looks like root@debian:home/username#. Again, don’t worry if the text doesn’t match exactly. Let’s first check for updates by running the following command, apt-get update. When it’s done run the command, apt-get upgrade. These commands fetch the latest updates then install them.
In some versions of Linux, we need to install the sudo command. To do this, run this command, apt-get install sudo. With that done, we can add ourselves to the sudo group. Type, sudo usermod -aG sudo your-user-name. Now we can type, exit to log out of the root account and then exit again to log out fully. Now log back in and type groups.
This will list the groups you are currently assigned to. Look for sudo in the list. If you see it, you are now able to use sudo. Let test this by entering the command sudo apt-get update. If everything is set up correctly, the command will run after you enter your password. Since we are now able to use sudo, we no longer need to log in as root.
Since we plan to expose our system to the internet, let’s install a firewall application called UFW. To do this, enter the command sudo apt install ufw. When the installer is done, we need to open the SSH port or we won’t be able to access our system. Enter the command sudo ufw allow ssh. Next, let’s enable the firewall by typing sudo ufw enable. It’s best to open another PuTTY session and log in before closing out of your current session just in case we messed something up.
With our firewall set up, our next line of defense is to enable automatic updates. While letting updates automatically install themselves could lead to problems, it’s a good security practice. One reason systems become compromised is due to outdated software that can be exploited. With automatic updates, if a security vulnerability is found, the new security patch will be installed without you needing to do anything.
To configure automatic updates, we first need to run the command sudo apt install unattended-upgrades. Now we need to run the command sudo dpkg-reconfigure --priority=low unattended-upgrades.
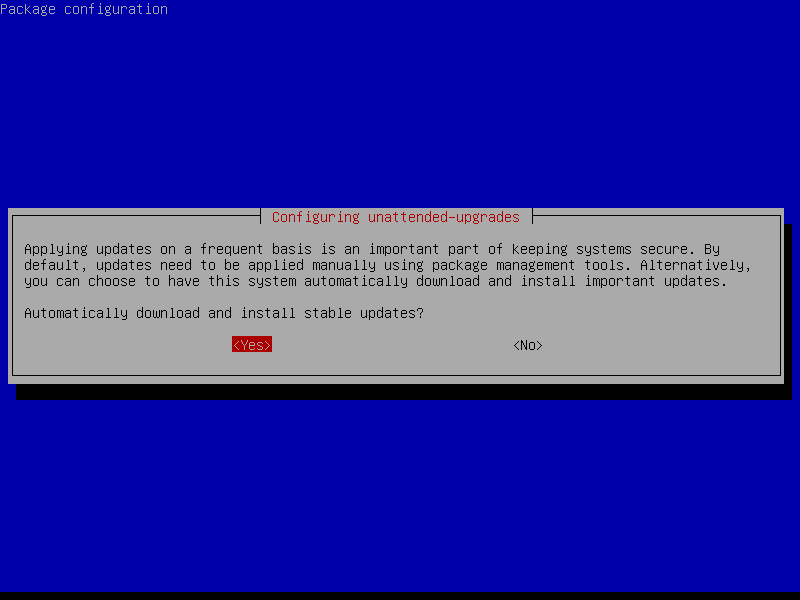
You should see a window like the one above, select the yes option then hit enter. Now our system will automatically install updates so it’s always up to date.
Since we have granted ourselves sudo privileges, let’s edit the SSH configuration file so that we can’t log in to the root account when we use an SSH connection. This means, if we want to login as root, we either need to have physical access to the system or we need to be logged in first and switch to the root account.
Start by entering cd /etc/ssh/ to move to the ssh directory. If we want to list the contents of this directory type the command ls. We need to edit the SSH configuration file so enter the command sudo nano sshd_config. This will open the configuration file in the Nano text editor.
Scroll down in the file using the arrow keys until you find # Authentication:. Under this section, we want to look for PermitRootLogin. This line controls the part of the SSH configuration regarding logging in as root. In my configuration, this line looks like #PermitRootLogin prohibit-password. This option in my configuration file is set to the value prohibit-password. This value disables the ability to log in as the Root user over SSH. Notice the # in front of this line? This is important because when you add a # in a configuration file, it tells the system to ignore it. We call this, commenting out a line.
My SSH file comments these out by default but also notes that what you see in the default configuration file is what the defaults are set to. In my case, I don’t need to make any changes to this file. If you’re configuration file doesn’t include a note like mine, or you’re not sure about the default values, you can edit your configuration file. First, make sure you have this line. If not, add it. If you do see it, make sure its value is set to prohibit-password. Finally, make sure the line is uncommented. Save the file by pressing CTRL + O to write the file. Confirm the name and press enter. Then, press CTRL + X to exit the Nano editor. We need to restart the SSH service so enter the command sudo systemctl restart sshd. Just like we did when we applied the firewall settings, open a new PuTTY session and make sure you can still log in.
There are many more steps we can take to secure our new Linux system even more but these should be a good start. Some additional security measures you can take are changing the default SSH port number as well as eliminating passwords altogether and generating public and private keys for logging into your system. These are all things that are beyond the scope of this tutorial.